 Ellingwood Ridge route to East La Plata and then La Plata's summit and then descent on the northwest ridge (standard) route.
Trailhead Elevation: 10,161 ft.
Ellingwood Ridge Summit: 13,220 ft.
East La Plata Summit: 14,186 ft.
La Plata Summit: 14,344 ft.
Distance: 12.30 mi.
Elevation Gain: 6111 ft.
Start Time: 7:18am
End Time: 8:13pm
Trip Report:
Both the blessing and the curse of this ridge is that you have to make it. There's no turning back. It is quite possibly the most committing route in all the state of Colorado. There is no escape.
My brother and I had been eyeing this route for years. I had even started a KML map plotting out key points along the way about 4 years ago. The window finally opened for us to give it a try here in 2022. We loved the idea of attempting this route in September as the mountain weather is much more stable and the odds of a full day of sun and clear skies were high. Getting caught in a storm or rushing your route because of looming weather are bad ideas. We also looked forward to the prospect of hiking with the aspens in full bloom and adding to the already wonderful beauty of the mountains.
We did a massive amount of research and preparation for this route. We read almost every trip report we could find on 14ers.com. We watched a number of YouTube videos especially enjoying VirtualSherpa's video. We spent time plotting possible waypoints in my BackCountry navigator app on my phone based on the knowledge we had gained hoping to understand where the major problem points were. We also plotted a handful of GPX tracks from other climbers in my app so we could see what others did. Special compliments to "alexhenes" on 14ers.com for his GPX track. These other tracks, especially the most detailed ones, were especially helpful as you could see almost exactly where they encountered trouble and were looking back and forth, even backtracking, to find the best passage. Though one can never 100% rely on these, in *most* places we found this to be helpful. We did encounter one moment where it seemed our GPS was tracking poorly and we seemed to be all over the place and that moment was illustrative of why this is not a fully reliable method or replacement for other route-finding and mountain knowledge.
We were also fully aware of a rescue that had just occurred on the Ellingwood Ridge about 2 weeks prior involving a group that cliffed out. We knew our decision making had to be top notch so as not to place ourselves into a situation we couldn't reverse or self-rescue. It was our goal for this day to use all our skills and knowledge to keep ourselves always in the best position to both succeed and to do so as safely as possible. We each have plenty of motivations to make it home at the end of the day.
We opted for a start shortly after 7am. This was partly due to the fact that we had just put up 13 miles and 7200 feet of climbing in the Tenmile the day before (see trip report) and a full night's sleep and rest were going to be helpful. We also felt confident in the near perfect weather forecast and felt we would be fine hiking late into the day. The final thought was having to do with not covering much terrain in the dark. This would prove to be a wise choice for us.
Gearwise I was using my Osprey Stratos 24 daypack. I had a solid amount of food for the day and carried 2L water, 1L Gatorade, 1L Tailwind. We certainly brought our helmets and also had climbing gloves to protect the hands on the rock. We each had headlamps with full charges knowing we would very likely be hiking out some of the standard route in the dark. We also had other basic necessities typical on a 14er hike. For shoes I wore my old Salomon Speedcross 3 trail-runners. While they are a fine shoe when new, mine had almost 600 miles on them and the treads were worn and I even had a hole by a pinkie toe. Big mistake on my part. The worn treads would cost me effort today as I had traction concerns in several places.
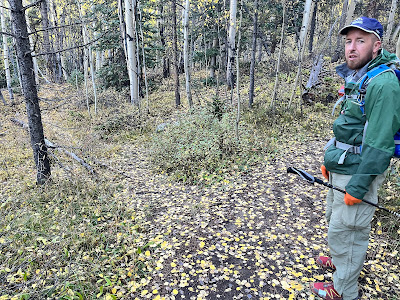
On a cool late September Saturday morning we found the parking lot full at 7:10am. We had to park in front of another vehicle along CO82. We walked up the dirt road to the actual trailhead and then hiked in the first mile of the main La Plata trail to the junction in my photo. It is a fairly evident junction, and happens as the main trail begins to take a hard turn to the right (south).
 |
| Turn left for Ellingwood Ridge |
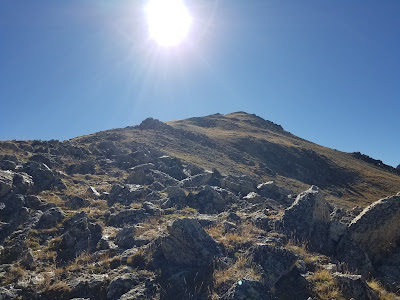
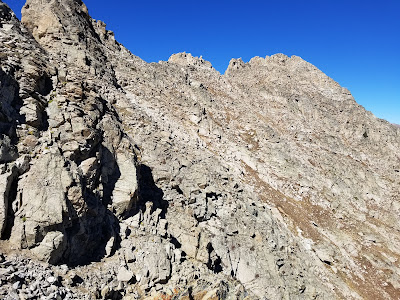
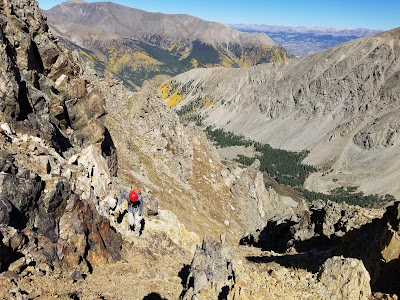
For the most part the Ellingwood trail is present and easy to follow though it is much thinner than the main La Plata trail. It was worth paying close attention to it. It was also helpful to do it in daylight. Route descriptions describe your next major turn being after the next creek crossing and this is spot on. A quick and hard right turn after the creek puts you on a still fairly recognizable trail. After this turn the name of the game is to stick to a soon developing ridge line in the trees. You can see it on basic topo maps. Somehow we lost it temporarily after about a quarter mile. We found ourselves in the low dip between ridges and dealing with massive amounts of tree deadfall. If you encounter this you're off route. We eventually made our way back to the ridge and continued upward. Its steep and there's no switchbacking so its quite the workout. My next photo shows the kind of ridge work you should be doing and you'll know you're on route.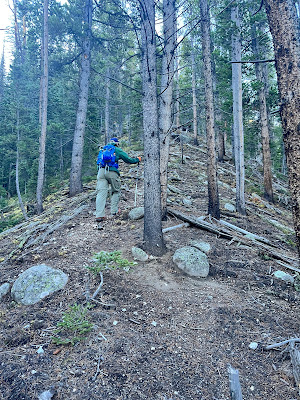
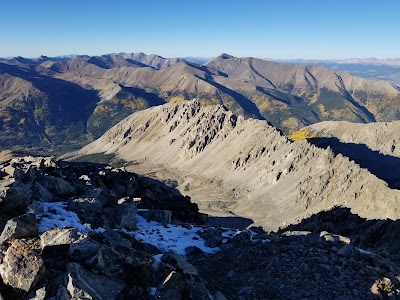
Eventually that steep climbing will spit you out into a rocky opening at treeline. The trail will end in a massive boulderfield and your day on Ellingwood Ridge will really begin. This might be one of those "go or no go" places with the weather. My next photo shows some of this next view and for the most part you're going to target climbing that "peak" which looms above you. Of course this is a false summit and you'll have plenty of climbing to go before you reach any sort of top. As you scout out possible ascent routes you'll see a rocky cliff band and you'll also notice a dirty gully off to the left. With a careful eye, you can spot that gully line running up the left side of the picture. Based on what we observed first hand and based on several other GPX tracks we followed, this seems to be the route almost everyone takes.
 |
| Target the steep gully line left of center |
The gully itself was very steep and as advertised. If you want to avoid the dirt there is rock on each side and you could probably do some class 3 scrambling as an alternate. We hugged the sides of the gully to get as much stable terrain as possible to ascend. Around 12100 the gully fans out into more of a steep rock slope that just continues upward. Directionally you pretty much just keep heading up while perhaps veering to the right ever so slightly. Your reward and saving grace is behind you the views continue to get more and more beautiful.
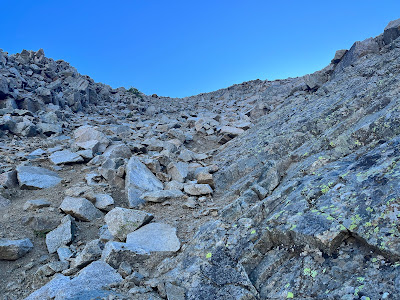 |
| Working up the steep dirt gully |
The panorama is looking to the northwest from Ellingwood Ridge's first slope. What a treat to see the aspens in full bloom. The large peak immediately across and right of center is Lackawanna.
It was around 12600 that we were finally rewarded with a respite from climbing. We stopped about 5 minutes to take in the views and rest before more work ahead. From this point until you hit 13000 on the ridge is easy, grassy, ridge running and pretty much the only easy part of the ridge. Enjoy it while it lasts because you won't get a rest again until you hit La Plata's summit.
 |
| Working up the easier grassy slopes from 12500 to 13000 |
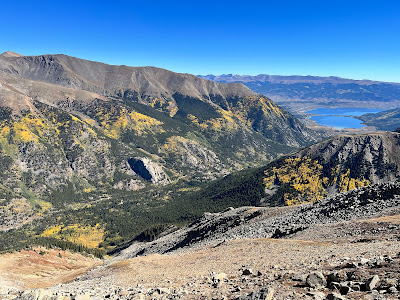 |
| More aspens to the northeast and on to Twin Lakes |
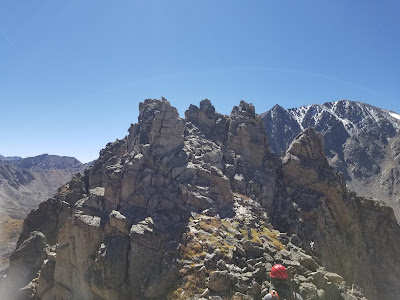
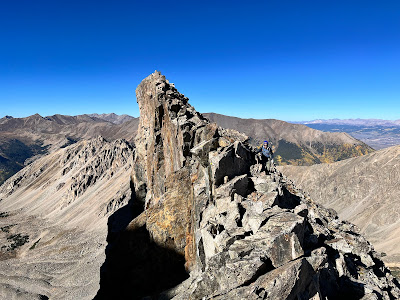
It is quite evident when the difficulties begin on the Ellingwood ridge. Two gendarmes get you warmed up and going with your route finding for the rest of the way. You'll very quickly get to know the name of the game: knowing when you can stay ridge crest, and knowing when you need to bypass. You would easily lose track of how many gendarmes and towers you could climb up the front side only to find the backside cliffs you out. If you're into climbing class 4 and 5 with high exposure you can do more of the these cliffs and stay ridge crest. We aren't that kind of party.
The thing one must really watch out for, especially if your climbing skills are middle-of-the-road like ours were, is getting trapped. Climbing up into an area where you get cliffed out and then not being able to downclimb or escape your predicament. We were ever mindful of this and it led to extra careful decision making.
As I describe our route along the rest of the ridge it will be nearly impossible to describe every maneuver and every obstacle encountered. What I've done in place of this is to create a photo journey to highlight some of the steps along the way and what happened to us. I would encourage you to have a look at the Google Map I've embedded below. On it you'll find two critical features. Our track is very detailed and you can see the places where we backtracked and bypassed features on the ridge. I've also plotted on the map all of the next 18 photos I'm sharing so you can see almost exactly where they are encountered along the ridge. I've used timestamping from the track and the photo to get the locations as precise as possible.
 |
The first two gendarmes, let the games begin
(Photo 001) |
You can see from our map that after taking Photo 001 and bypassing these first two gendarmes we very quickly got stopped on the ridge crest, backtracked and bypassed alongside a tower. As that was happening we took Photo 002. Our bypass took us below a feature many call the "leap of faith". Its roughly a 5 foot gap with a 20 foot drop. Many parties skip this as we did. Our photo 002 shows what it looks like from below.
 |
Looking up at the leap of faith
(Photo 002) |
Shortly after passing the leap of faith we had another very evident cliff ahead and so we were working another bypass off the ridge. We were surprised how steep the east side of the ridge was. It was the less technical side most of the time but the dirt and scree on the slopes was so steep you could never let down your guard.
Neither of us wanted to say it, and we didn't even bring it up til several hours later, but we were both surprised how quickly and how much difficulty we faced this early on the ridge. We must have mutually felt it a bad omen to say something before facing what were supposed to be the crux difficulties to come. This only adds to the lore of Ellingwood Ridge and its famed challenge for all climbers.
 |
Mark picking a route to descend and bypass the cliff ahead
(Photo 003) |
 |
On the bypass around an early cliff
(Photo 004) |
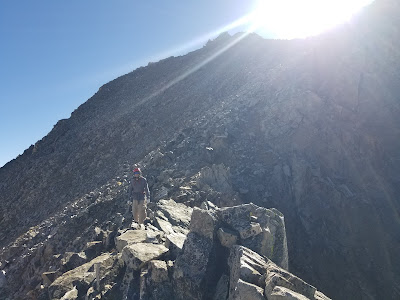
Our photo 005 below shows what many of these towers look like from the south side and why technical climbing and even rappels are often necessary to go up and over everything. Past this photo was a short respite of some easier traversing along the ridge that leads up to the high point of the ridge at 13,220 feet of elevation. For the bulk of the ridge you stay so very close to the 13,000 mark. It won't be til the approach to the Buttress and after that the last 1000 feet are gained.
 |
Looking back at the cliffs we bypassed
Photo 005 |
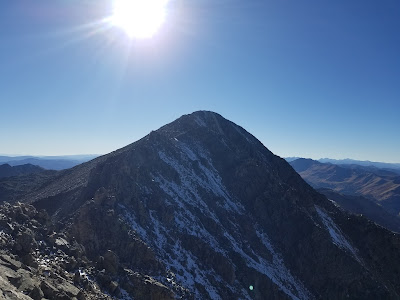
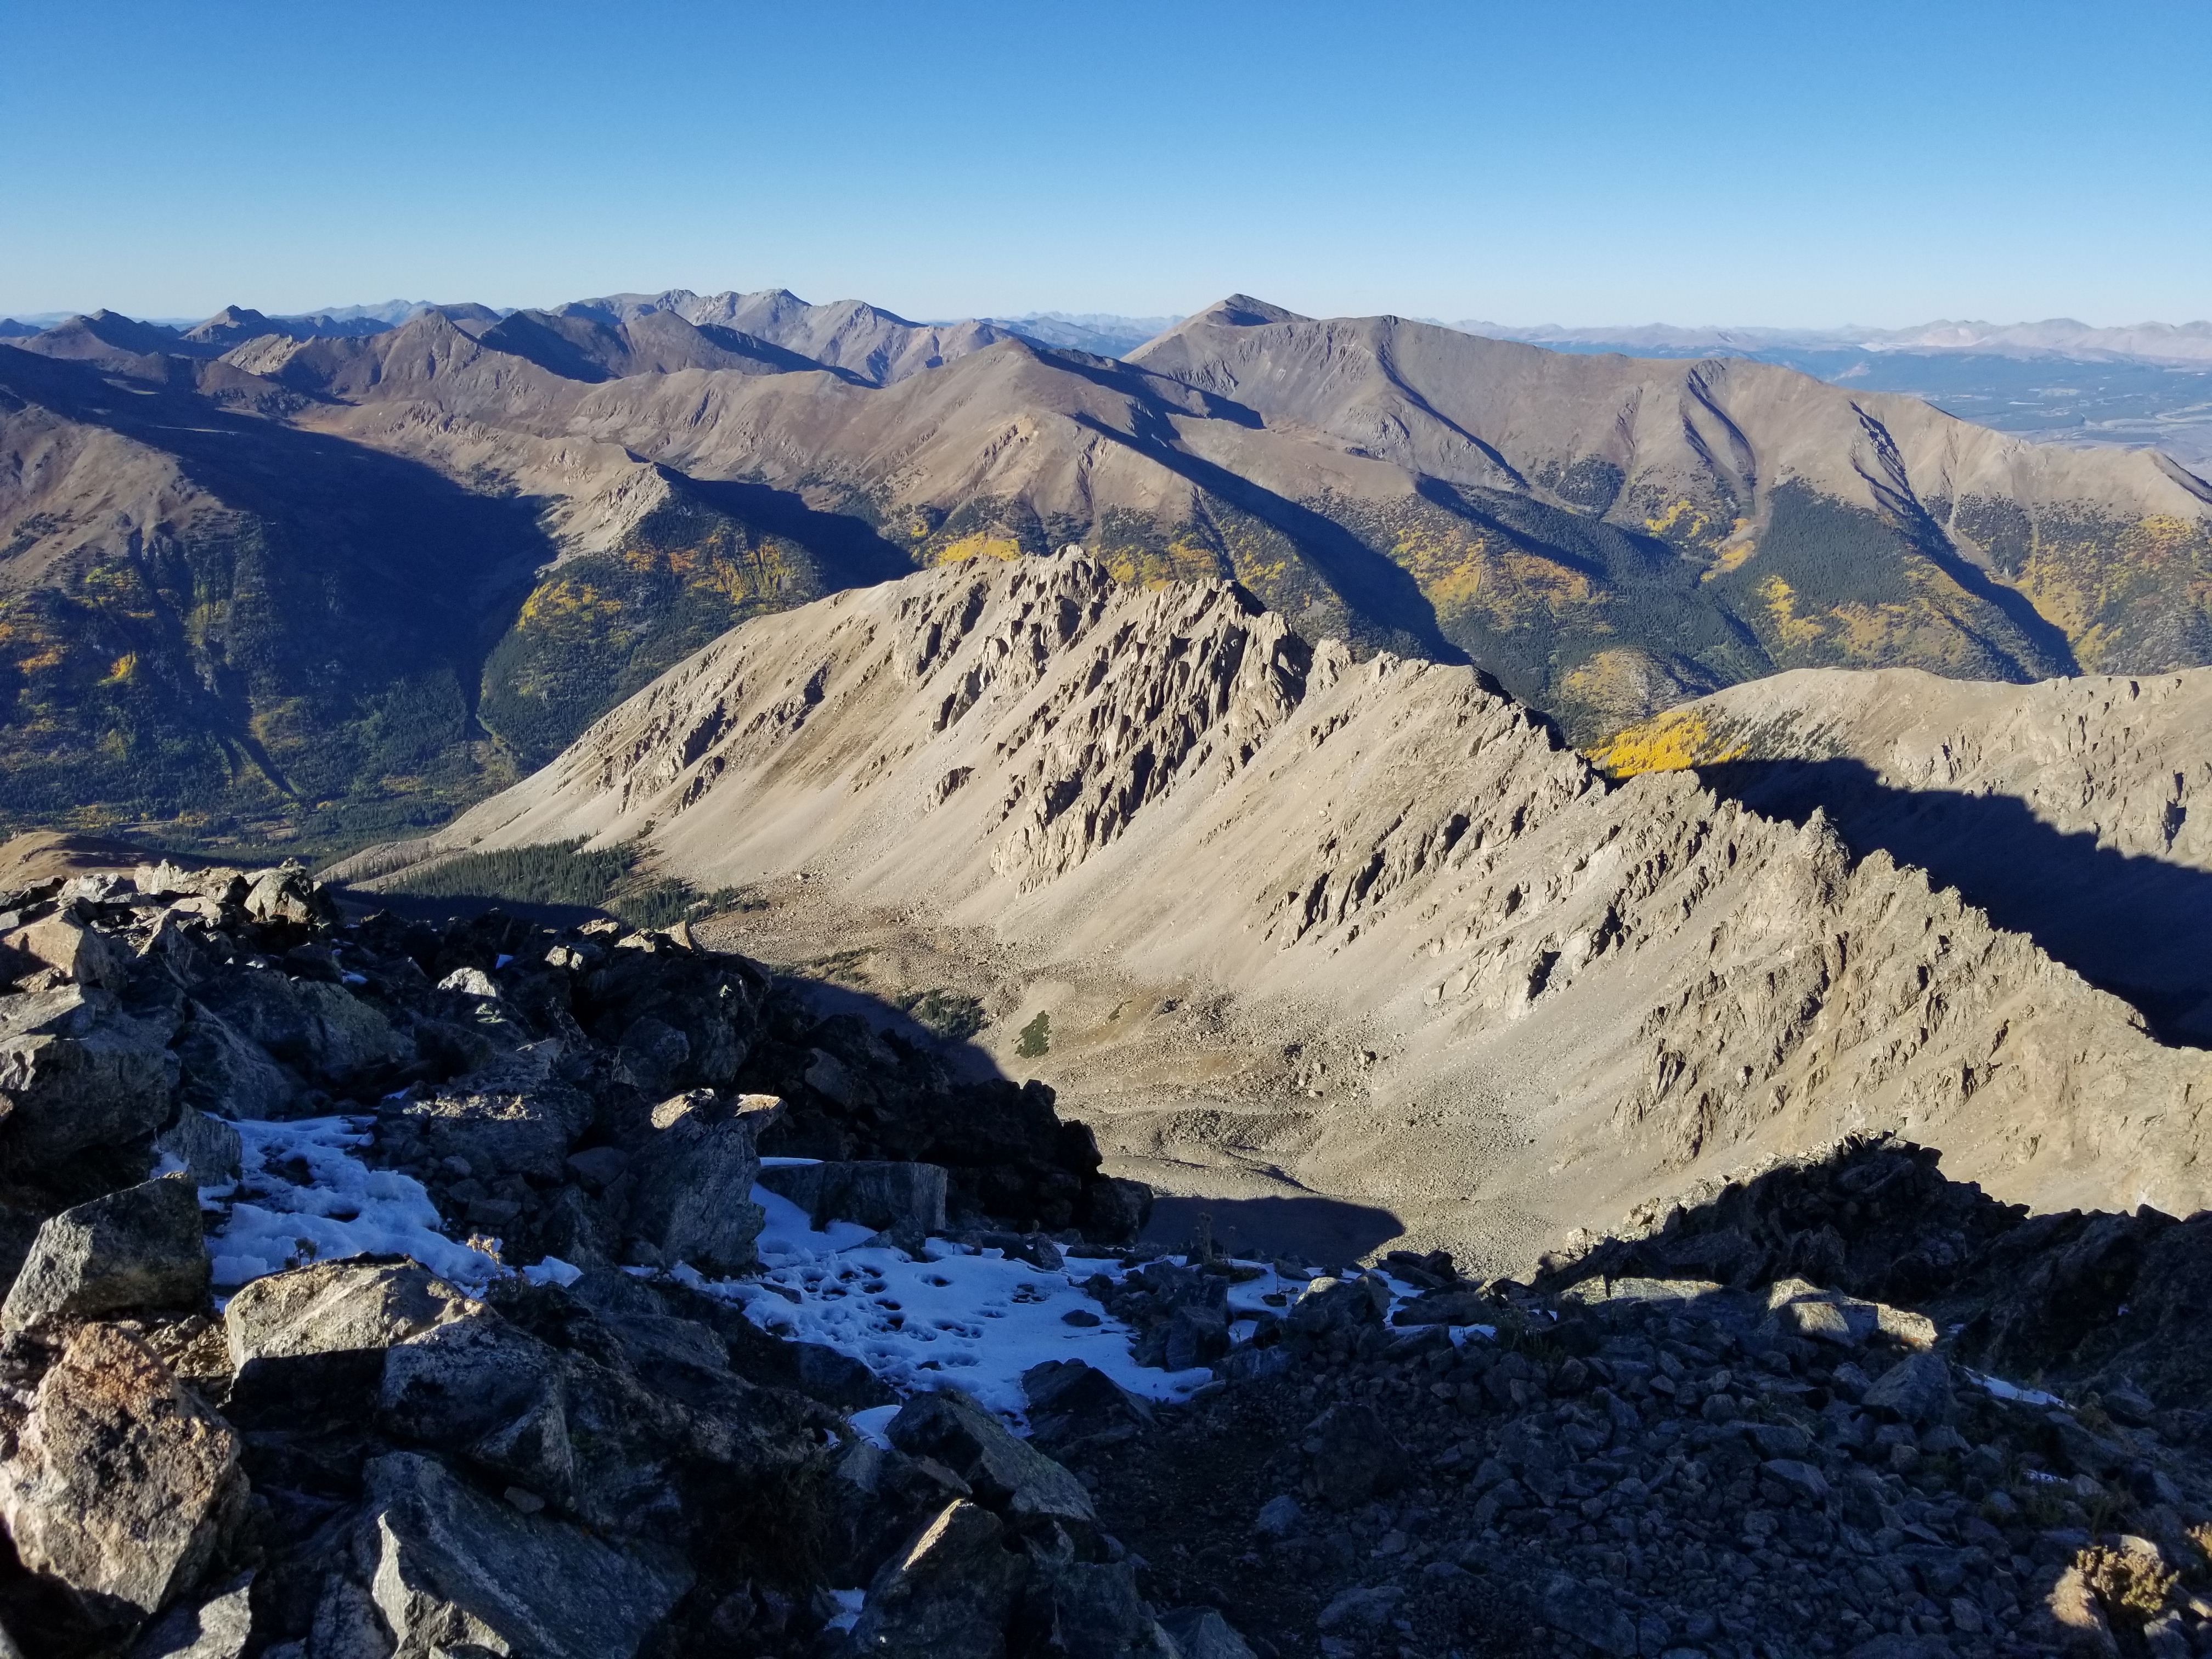
The ridge seems never-ending. In many ways it is. The only way to really measure progress is to see how La Plata ever so slowly creeps closer to you in view. Photo 006 is one of the classic views of La Plata and you'll see this same photo in most trip reports. You can see on my map the location and progress along the ridge from this viewpoint.
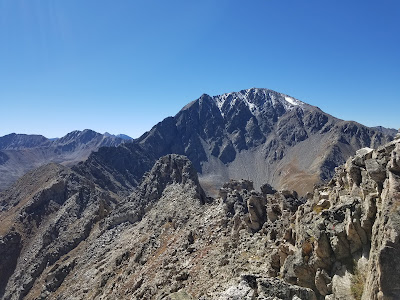 |
Classic view of La Plata from Ellingwood
Photo 006 |
360 Photo from roughly the same vantage point as Photo 006.
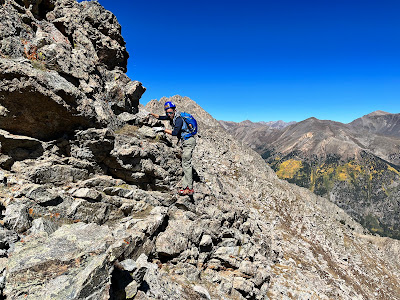
Photo 007 shows the somewhat difficult descent off the south side of Pt 13,220. The exposure was mild but it felt nearly class 4 in its near verticality with the moves we made. We found ourselves in this scenario several times along the ridge. There would be 10-15 foot downclimbs with pretty good holds and mild exposure. We would typically opt for paths and moves with lower exposure even if they carried some class 4 almost 5 difficulty.
 |
Mark working a short class 3/4 downclimb
Photo 007 |
 |
Looking back at a bypass of the massive tower at left edge of view
Photo 008 |
Photo 009 shows some of the "easier" movies along the ridge when you're not hanging on for dear life. That photo was taken shortly before the final approach to Pt13138 which is sometimes called the "Grassy Summit". We felt it was quite evident along the ridge which little peak was this grassy summit. Its notable as the terrain gets even more difficult and the first major crux area approaches shortly thereafter. This first crux area looked like an extended area of very complex and difficult terrain with high exposure and high difficulty of climbing. We knew many groups opted to bypass the first crux by descending off the east side, some as far as down to 12600. That was basically our plan and what we saw with our own two eyes would pretty much confirm this plan.
 |
Mark working his way along a ledge just off the ridge
Photo 009 |
Before reaching the first crux area, we actually found some complex terrain shortly after descending off Pt13138. In a rare moment, we used some a route on the west side of the ridge to descend briefly down and around what some know as the "bunny ears". We found a 10 foot class 4 chute to drop into easier terrain. It led us into a steep scree slope which we then used to return to the ridge. We knew we didn't want to stay on the west side long with our big, low, bypass on the east side approaching quickly.
 |
Approaching the Bunny Ears features
Photo 010 |
As the first crux approached we began weighing our options. We were fairly certain with our skillset and risk tolerance we weren't going to try to stay near ridge crest and deal with the first crux head on. But we also weren't sure just how far down we wished to descend off the ridge. We found a steep but do-able gully to begin to drop and even within the gully we had to manage some small cliffouts. We would descend but doing so while trying to traverse forward to the south to gain ground along the ridge.
As we dropped to around 12750 or gully opened wide into the east slopes of Ellingwood Ridge. From here we could look to the south with several ribs guarding progress if we stayed high on this bypass. We could try the ribs but you never knew what you would find on the other side. We opted to descend further and as we looked ahead could see a grassy bench on the biggest of the ribs that would looked like good passage forward. We carefully traversed across these steep slopes which were so steep we would lean into them at times. I would often have hand on dirt. My hands were so beaten up from this trip and I was glad to have worn my rock gloves. My fingertips were almost shredded from all the abrasive rock and the many thistles I would accidentally put my hands into.
The grassy bench ended up being at 12600, a 400 foot drop meaning 400 more gain ahead of us. But we could see a workable line before us that appeared to lead back to the ridge and this pleased us. This was another theme of the day. What a relief it is every time you can see a path forward and the route, even if for a few moments, becomes clear. Photo 011 just below shows our return to the ridge proper after a long and low bypass around the first crux area.
 |
Returning to the ridge, again, through a steep scree gully
Photo 011 |
As a sign of the cruelty of Ellingwood Ridge you'll hear what came next for us. After a long bypass in which we had to drop 400 feet of precious elevation we make it back to the ridge and are hopeful to stay on the ridge crest for awhile with some slightly easier terrain. So we make our way forward from where we took Photo 011 (see our map) and we'd hardly made any more progress before we hit another difficult tower. My brother climbs some moderate class 3 up and continues for sometime not knowing if it will go completely or cliff out. Part of the ascent was along a narrow moderately exposed ledge. He has gone so far forward in his scouting that I can hardly here him.
With some wishful thinking I began to decide this must go so I begin to climb up to join him. I moved up through most of the exposed ledge. My brother finally reaches a point where he and I decide this route won't go. We backtrack all the way through the ledge back to a saddle. We find a bypass hugging the ridge crest perhaps 30 feet down. You can see this rather large backtrack on our map track.
From that moment we did make a little progress forward without too much trouble. La Plata continued to draw ever closer to us. We could also see what we assumed to be the buttress looming closer. The ascent of the final 1000 feet was soon to begin.
I remember seeing on the topo maps that the approach to the buttress looked reasonably "smooth". I wondered if this would be one of the easier parts of the ridge. In reality, that depends. We found the approach to the buttress to be a catwalk-type ridge. It was a gradually ascending narrow ridge with small bits of climbing, moderate amounts of exposure and several narrow catwalks. At the top of this ridge was the buttress with what appeared to be several gullies and a very steep class 3 face. We weren't sure how one would tackle the buttress as we peered on from a distance. We held some thought and debated as to our plan and we ultimately decided to avoid this catwalk ridge and once more seek a lower bypass. We could see more passable terrain on the east side of the ridge and it didn't appear we would have to lose much elevation to use it.
The only caveat was that it was one of the steepest dirt descents we had encountered all the day to begin this bypass. You can see what that initial descent on the dirt looked like in Photo 012 below. In some parts the dirt was thin with slabby rock underneath. This was a very rare moment where we literally found ourselves butt-sliding for short bits on the dirt to keep our rate of descent under control. It almost felt like we should be glissading on snow.
 |
Descending, almost butt-sliding, very steep terrain to bypass the catwalk ridge before the buttress
Photo 012 |
As it turned out our bypass really didn't lose much elevation because of the ascending nature of this portion of the ridge. We were quickly climbing again and found a nice talus slope that looked as though it would climb out to a ridge top. We followed this slope until it topped out only to be disappointed when we found no obvious route forward. It was also disappointing that we were not at the top of the buttress at all. We finally picked a route climbing through near class 4 rock and then rounded a corner having to make some near class 5 moves to drop into the front side of the buttress. This was all challenging and complex terrain.
In Photo 013 below I have a cropped screenshot from a YouTube video showing the front of the buttress and in yellow is the gully we ultimately ascended. To the right of our ascent gully, somewhat out of view, were 2 or 3 other gullies. This was a difficult area in which we explored all options. We were approaching a moment where we had to wonder if we'd be stuck. One of the gullies had a large boulder choking up the top. Others seemed to involve a level of climbing beyond our comfort level. We finally saw this narrow, almost hidden gully which was on the far left of the buttress. It had a bulge in the middle and was narrow but we were able to squeeze ourselves up through it with some awkward moves. It was a difficult climb but the exposure was somewhat mild. Much to our joy, atop this gully we found the terrain to be passable and once more we could see a route forward.
 |
Screenshot from a YouTube video of our climbing route on the Buttress.
Photo 013 |
Photo 014 below shows my brother topping out on our escape gully from the buttress. If we hadn't found this gully and it hadn't worked for us we honestly weren't sure what our next move would have been. We would nearly have been out of options for going forward. And as I said at the beginning of this report, there's no turning back. You certainly don't want to redo all the ridge that you've just completed, that's almost entirely out of the question. The only other option would seem to be a nightmarish descent down the very steep east slope into a basin in which there's no trail. You'd have to bushwhack back out to CO82 and then hike up the road 2-3 miles. All of that is less than appealing and so it emphasizes the need to be patient in route-finding and find the next route forward because going back is hardly an option.
 |
David ascending our narrow class 3 chimney to escape the buttress
Photo 014 |
 |
Looking back at Mark atop the buttress and the rest of Ellingwood
Photo 015 |
 |
Mark on the ridge with a dramatic cliff nearby
Photo 016 |
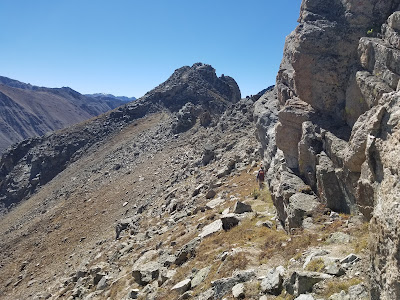
Above the buttress we did finally find the terrain ease up slightly. It became more about climbing and gaining elevation through talus slopes than climbing rock towers. We felt like we were seeing the summit of East La Plata come into sight and were hoping to top out and be near the end of the Ellingwood Ridge.
 |
13600 on the ridge, looking at somewhat easier talus slope towards East La Plata
Photo 017 |
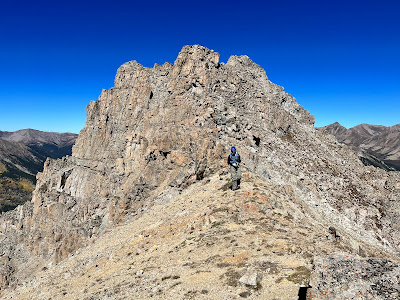
Our hopes of an easy finish would be dashed as we passed 14000 feet and were greeted with one more rock tower obstacle. As usual my brother began to climb up the class 3 face to scout ahead. This obstacle can be seen below in Photo 018. He found we wouldn't make it too far with the up and over route. To the right was a reasonable looking slope except it was in the shade and had just less than an inch of snow covering most of the rock. It was steep enough and somewhat exposed that we really didn't desire to test the traction of the snowy rocks. Once more we began to wonder of our path forward. I finally looked to the left of this class 3 tower and found a steep slabby section with some awkward moves to get started. We ultimately decided this route would have to go. I took on the initial moves once my brother had descended back down to me and I did find this would go. Some more class 3 moves and a bit of route-finding followed but eventually we found ourselves climbing up to the summit of East La Plata and some momentary joy.
We consciously chose not to linger there because we knew we still needed to navigate a few obstacles on the ridge to La Plata. It was also nearing 5pm and we knew we'd be in a race against the setting sun. We had done the math and knew we'd be hiking by headlamp at some point on the standard route descent, it was just a question of how much. On the plus side, our main goal was to not be on the Ellingwood Ridge in the dark and that would definitely not be a problem today.
 |
Class 3 tower that cliffs blocking passage to East La Plata
Photo 018
|
The descent off East La Plata was not too difficult at first but we would soon encounter one more gendarme obstacle on the connecting ridge to La Plata. One more time, not knowing what the descent would look like on the backside, we plotted a bypass on the south side of the ridge. It was a steep descent to start and then we made some progress traversing laterally towards what looked like an obvious and wide dirt gully to use to ascend back to the ridge. This worked for us and it wasn't long before we made one last climb up to the summit ridge. From here it was finally smooth sailing to the La Plata summit.
 |
From the summit of East La Plata looking to the Main Summit, the sun is waning
Photo 019 |
This would be my fifth time standing atop La Plata Peak which is also the fifth highest summit in the state. We stood up top at 5:15pm after a 10:12 ascent. By far the longest ascent time of any peak we've climbed. It was an emotional summit and we let out some loud hoops and hollers. After the intense focus and stress we had on the route-finding and testing every hold and move it was a huge release to finally let go. Of all our mountain summits this was one of the most amazing efforts and emotional efforts we've had perhaps only to be topped by our finisher summit on Capitol Peak. 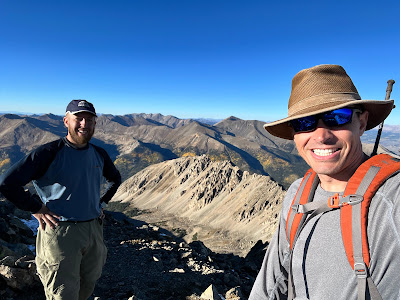 |
| Quite the happy summit photo with the mighty Ellingwood Ridge behind us. |
360 Photo from La Plata Peak's summit
We spent about 15 minutes enjoying our hard earned summit and knowing the clock was ticking with the daylight. We kept up a pretty good pace on the upper stretches of the mountain working with a goal to hit treeline before having to turn on the headlamps. We still took time to grab some photos and enjoy the views along the way.
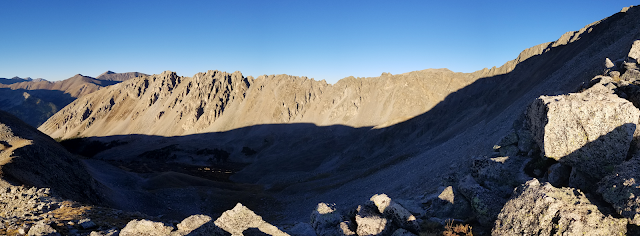 |
| Pano of the Ellingwood Ridge taken during our descent |
We finally turned on headlamps around 7:15pm when we were starting through the meadows in treeline. It was a nice cathartic descent on the rest of the hike out through the trees. We had face up to some near dead-ends in a couple of places on the ascent and had to bypass several obstacles beyond our comfort zone but with some great perseverance we made it and what a joyous day it turned out to be.
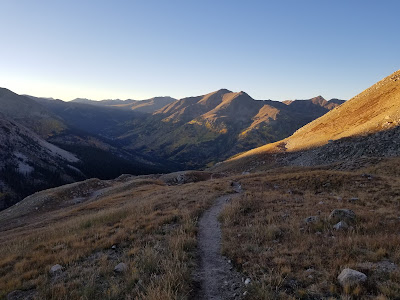 |
| The shadows lengthen on a long but fantastic day |
Track:
I have a track and waypoints from the activity all contained in the embedded Google Map. Check it out and use at your own risk.

 Ellingwood Ridge route to East La Plata and then La Plata's summit and then descent on the northwest ridge (standard) route.


.jpg)


No comments:
Post a Comment